Photoshop AI Sky Replacement Tool Explained
AI sky replacement tools have revolutionized the way photographers and graphic designers can enhance the look of their images.
With the help of artificial intelligence and machine learning, these tools can quickly and easily replace the sky in your photos with a more appealing image in just a few clicks.
In this blog post, we’ll explore the AI sky replacement tool in Adobe Photoshop and how you can use it to enhance the look of your photos.
What is the AI Sky Replacement Tool in Photoshop?
The AI Sky Replacement tool in Adobe Photoshop is a feature that uses artificial intelligence and machine learning algorithms to automatically replace the sky in your photos.
This tool was introduced in Photoshop CC 2021 and is designed to be quick and easy to use, allowing you to quickly enhance the look of your images without having to spend hours editing the sky in your photos.
How Does the AI Sky Replacement Tool Work in Photoshop?
The AI Sky Replacement tool in Photoshop works by analyzing the image and identifying the sky in your photos.
The tool then uses machine learning algorithms to determine the best way to replace the sky based on the features and colors of the sky in the image. The new sky image is then automatically blended into the original image, creating a seamless and natural-looking sky replacement.
Why Use the AI Sky Replacement Tool in Photoshop?
There are several reasons why you might want to use the AI Sky Replacement tool in Photoshop:
Time-saving: Replacing the sky in your photos can be a time-consuming and tedious task, but with the AI Sky Replacement tool in Photoshop, you can quickly enhance the look of your images in just a few minutes.
Improved image quality: With the AI Sky Replacement tool in Photoshop, you can easily improve the look of your images by replacing a dull or overcast sky with a more appealing sky image.
Convenience: The AI Sky Replacement tool in Photoshop is designed to be quick and easy to use, so you can quickly enhance the look of your photos without having to spend hours editing the sky in your images.
Creative possibilities: With the AI Sky Replacement tool in Photoshop, you can experiment with different sky images and create unique and creative images that might not be possible with a real-life sky.
How to Use the AI Sky Replacement Tool in Photoshop
Using the AI Sky Replacement tool in Photoshop is a simple and straightforward process. Here’s a basic step-by-step guide to help you get started:
Step 1: Load Your Photo into Photoshop

The first step is to load your photo into Adobe Photoshop. This can be done by either dragging and dropping the image into the software or by importing the image through the File menu.
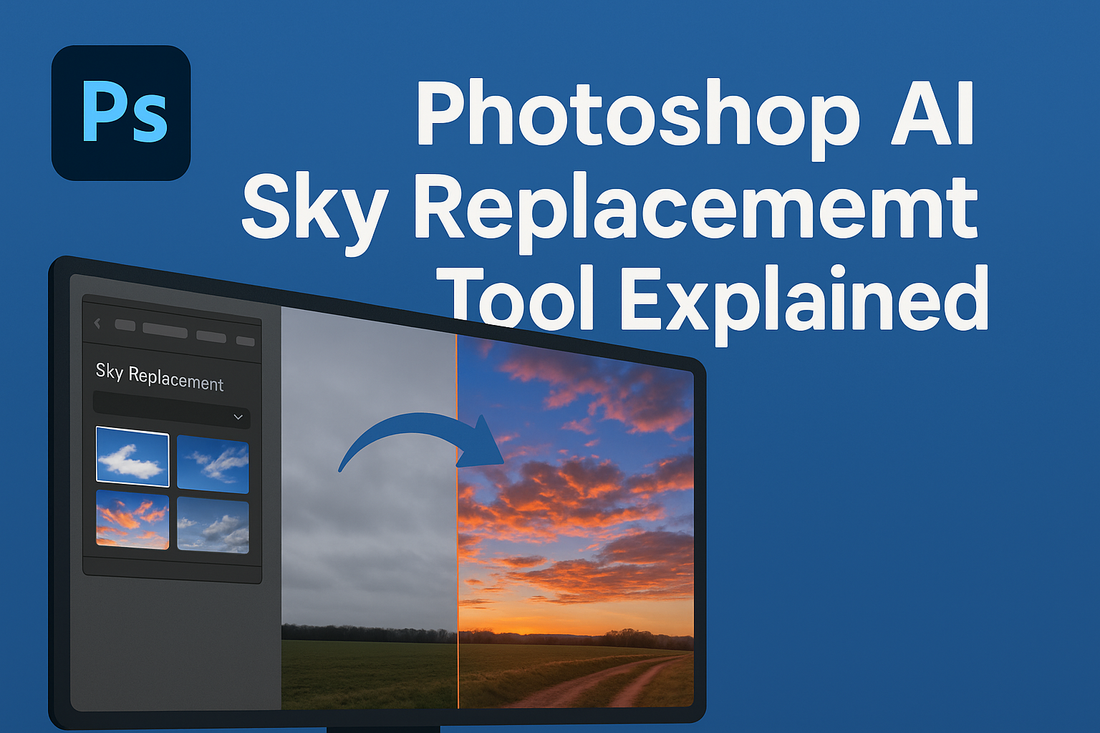
Step 2: Select the AI Sky Replacement Tool
Once your photo is loaded into Photoshop, the next step is to select the AI Sky Replacement tool. This can be found in the Edit>Sky Replacement...

Step 3: Choose the Sky Image You Want to Use
The next step is to choose the sky image you want to use to replace the sky in your photo. Photoshop provides a library of sky images to choose from, so simply select the image you want to use.

Step 4: Apply the AI Sky Replacement
Once you’ve selected the sky image you want to use, the next step is to apply the AI sky replacement. This is done by simply clicking the “Replace” button in the AI Sky Replacement tool. Photoshop will then automatically blend the new sky image into the original image, creating a seamless and natural-looking sky replacement.
Step 5: Fine-Tune the Sky Replacement
While the AI Sky Replacement tool does an excellent job of automatically blending the new sky image into your photo, there may be some areas where the replacement doesn’t look quite right. In these cases, you can use the brush and masking tools in Photoshop to fine-tune the sky replacement.
For example, if there are any areas where the sky replacement looks too dark or too bright, you can use the brush tool to paint in the desired brightness or darkness.
Additionally, if there are any parts of the sky replacement that you don’t like, you can use the masking tools to remove the sky replacement in those areas and revert back to the original sky.
Step 6: Save the Image
Once you’re happy with the sky replacement, the final step is to save the image. You can save the image in any format you like, such as JPEG, PNG, or TIFF. Additionally, you can choose to save the image with or without the original sky, depending on your preferences.